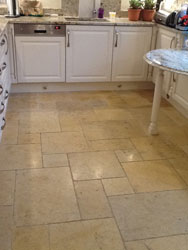
Limestone floor restoration is a meticulous process that involves several steps to return the stone to its original beauty and functionality. Limestone is a porous and relatively soft stone, making it susceptible to staining and also wear. However, with the right techniques and materials, these floors can be revitalized.
Limestone Floor Restoration Steps

 Step 1: Assessment and Preparation
The first step in limestone floor restoration is a thorough assessment of the floor’s condition. This includes identifying stains, scratches, cracks, and also any other damage. Once the assessment is complete, the area needs to be prepared. This involves removing furniture, rugs, and any other items that may obstruct the restoration process. The floor should then be cleaned to remove dirt and debris.
Step 2: Cleaning
Cleaning is a crucial part of the restoration process. Professional-grade cleaning solutions and equipment are often required to effectively remove deep-seated grime and stains. The cleaning process may involve:
- Using pH-neutral cleaners specifically designed for limestone.
- Employing a rotary scrubbing machine to lift dirt and contaminants.
- Rinsing the floor thoroughly with clean water.
Step 3: Grinding
For floors with significant wear, scratches, or uneven surfaces, grinding may also be necessary. This process uses a series of abrasive pads or diamond grinding discs to smooth the surface of the limestone. Grinding can be done wet or dry, depending on the specific needs of the floor and the preference of the technician. Grinding removes a thin layer of the stone, eliminating imperfections and preparing the surface for further treatment.
Step 4: Honing
Honing is a process that further smooths the limestone surface and enhances its appearance. This step involves using finer abrasive pads to achieve a satin or matte finish. Honing can also help to remove minor scratches and stains that were not eliminated during grinding.
Step 5: Polishing
If a glossy finish is desired, polishing is the next step. Polishing utilizes very fine abrasive pads and often a polishing powder or compound to achieve a high shine. This process can bring out the natural beauty of the limestone and create a reflective surface that enhances light in the room.
Step 6: Sealing
Sealing is a crucial step in limestone restoration as it protects the stone from future stains and damage. Sealers penetrate the pores of the limestone, creating a barrier that repels water, oils, and other contaminants. There are various types of sealers available, including:
- Impregnating sealers that penetrate deeply into the stone.
- Topical sealers that form a protective layer on the surface.
- Enhancing sealers that add a slight sheen and improve color.
The choice of sealer depends on the desired finish and the specific needs of the limestone floor.
Step 7: Maintenance
Proper maintenance is also essential to keep restored limestone floors looking their best. Regular cleaning with pH-neutral cleaners is recommended to avoid damaging the sealer. Additionally, periodic resealing may be necessary to maintain protection. It is also advisable to use rugs or mats in high-traffic areas to prevent wear and tear.
Conclusion
Limestone floor restoration is a multifaceted process that requires expertise and attention to detail. From initial assessment to final sealing, each step plays a critical role in revitalizing the stone and ensuring its longevity. With proper care and maintenance, restored limestone floors can remain beautiful and functional for many years. If you are looking to restore your limestone flooring please call today on 01296 294304.